Friday, January 13, 2017

Torrent Nose Cone Payload Modification

My 4" diameter Madcow Torrent has become quite a workhorse for various learning experiences and electronic payload tests. Now that I'm doing some dual-deploy flights, I though it might be useful to add a payload section in the large nose cone.

My general idea for the design was to make some plywood centering rings to epoxy in a BT-70 tube, and make it so that I could have two all-thread rails to hold a sled, or else just cap off the end of the section after stuffing whatever I want in there.

A lot of this was made possible by the access to, and help with, the laser cutter at Boulder Public Library's BLDG61 - so lots of thanks to the super friendly and helpful folks there.

Parts

The parts, all cut and gathered together (not including hardware), are shown below.


The BT-70 tube is held in place by the two large rings to the right (from 1/8" plywood), with the smaller of the two going forward in the nose, and the aft ring being mounted flush in the shoulder.

The other pieces (in 3/32" ply), shown in this design view, are used to form the ends of the payload bay. Each end consists of two pieces. An "I" in the label means it fits inside the BT-70, and an "O" means it matches the outer diameter of the BT-70. Mated together, each set forms a nice, easy to center cap for an end of the tube.


  • FI and FO are for the forward end.
  • AI1 and AO1 are for an aft cap that can be bolted on without the use of rails.
  • AI2 and AO2 are for an aft cap that is held on by two rails.
  • The unlabeled rings are used to make an adapter so I can fit a BT-60 tube in the payload, since a recent version of my rocket tracker fits into a BT-60.
Additional hardware needed:
  • 6-32 all-thread rod, approximately 20" depending on the exact bay length.
  • Two 6-32 T-nuts.
  • Two 6-32 threaded inserts.
  • 6-32 nuts, bolts and washers (two each).
  • Two eye bolts, with matching nuts and washers.
  • Epoxy
  • Wood glue

Assembly

First, I aligned and glued FI and FO together, then inserted (and epoxied in place) two 6-32 T-nuts. These will allow me to insert, and also remove, the all-thread rods. Note that the large part of the T-nut will be away from the BT-70.


On the forward centering ring, I added a couple small square pieces of plywood to help hold two 6-32 screw-in threaded inserts, which I also reinforced with epoxy. These will be used to bolt on aft cap A1. The two small open holes will be used for eyebolts.


Next I glued the fore and assembly onto the BT-70 tube.


Then the forward centering ring. Note that I included some holes incase I ever put an altimeter in there (though I'm not putting a matching hole in the nose cone at this time).


The two pieces of A2 were matched and glued together. This photo shows how they will be held on to the bay with the all-thread rods.


Next I bolted and epoxied the eye bolts onto the aft centering ring.


Now, I cut off the end of the end of the nose cone, leaving as much of the shoulder in place as possible. I then epoxied in the BT-70 assembly on just the forward end, while using the aft centering ring (unglued at this time) to keep it in position.


Finally, I epoxied in the aft centering ring securely, then trimmed off the excess BT-70 tube. The nose cone is all set to go. I can choose to close up the bay with either A1 (cap with no rails) or A2 (rails) - though I have not yet designed or made a sled for A2.


Overall, the modifications added 103g to the 186g nose cone (with the A1 cap). Kind of a lot, but let's face it - Torrent is already a heavy beast not exactly optimized for weight.

As of this writing, I've not yet flight tested it. I have some concerns about the smallish eyebolts holding, especially if the payload adds any significant weight. I will probably do one or two initial tests with dead weight in the payload, instead of expensive electronics.

4/23/17 update: I did the first flight test withe the modified node cone on 4/23 at Tripoli Colorado's 4/23 launch. Just in case, I substituted dead weight for electronics. Everything was handled perfectly, so the next opportunity I have I'm going to do a launch with a larger I motor and include my custom built GPS tracker in the payload.


Saturday, January 7, 2017

Rocket Tracking Payload, v2


Stunning to see that I haven't made a new entry in this blog in over two years. Stunning to me, that is. Not so much to my readership, which has ballooned from zero to... zero.

But this is serving the exact purpose I intended, which is to provide a way for me to look back on my growth and progress in the hobby. In the past couple years, I've gotten more experience with HPR, done my second high power build (a Sirius Eradicator), attended many launches with NCR (now as a member) and other Colorado clubs, and had a few attempts (one - finally - successful) at electronic dual deployment with my Torrent. But of course, I've not done nearly as much as I would've liked. Never will.

One project that I have been working on, slowly, is a new version of an Arduino and Xbee radio based tracker and data logger. I'd previously written about my first version, used successfully several times in Torrent. This new version is essentially the same concept, but the goal was to make something more compact so that I can do more launches inexpensively, testing and improving each time.

The Design

Specifically, the hardware differences in this version are:
  1. I took out the barometric pressure sensor and the accelerometer. This was just for simplicity on this initial go. I've come to realize how essential these are and will be adding them back in.
  2. The Arduino Pro Micro has been replaced with a Fio v3 from SparkFun. This unit has a place for the Xbee to plug right in. 
  3. I've swapped out the GPS with this inexpensive unit, also from SparkFun.
  4. I'm now using a 1000 mAh LiPo battery.
I've got all this packed into a 3D printed holder that I created, which has everything fit nicely into a BT-60 payload space about 4 inches long.

The Fio is a nice package, as it integrates a LiPo charger. The one challenge I had with it is that the pin assignments for SPI seem to be messed up, so I had trouble initially getting the SD card to work. I eventually solved the problem by editing the pins_arduino.h. Useful info on the issue is here.

The 3D printed enclosure, designed in OpenSCAD, was a fun part of this project. It took me several iterations to get the fit just right. Still, it is not perfect. It consists of three parts, and in order to cram in all the components and hold it together solidly, there are a couple M3 screws that I use. These are probably not necessary, as the payload bay tube walls will certainly keep things together. The drawback that I realized later is that the enclosure does not allow access to the USB charging port on the Fio, so the unit has to be disassembled in order to charge the LiPo through the Fio.


Here's what it look like when assembled with all components:


As my test platform, I custom-desgined a rocket with a suitable payload bay. It has a 24mm motor mount and plywood motor mount with through-the-wall basswood fins. My intention was to make it sturdy enough to handle Aerotech single use F motors, but still fly on (relatively) inexpensive Estes black powder E motors.


The results so far...

Doing ground tests with the transmitter/receiver pair (XBee Pro 900 XSC S3B, wire antenna in transmitter and RPSMA antenna on receiver), I got a quarter mile range in my hilly neighborhood. Hopefully on a large flat rocket range it will be better. 

My first flight tests involved flying the rocket with a dead weight payload having the same mass as the electronics, just to make sure that was OK. I did two flights, using an Estes E9-4 and an Aerotech F32-6T. Both perfect, with the F motor taking it to over 2100 ft, and eventually landing 0.6 miles from the launch rod (it has a 24" nylon chute). I wished the payload had been in and working for that flight! Exactly the sort of thing I want for testing.

The first test flight with the payload, at the SCORE launch on November 5th, technically went perfectly, but the results obtained were downright odd. The GPS data, particularly the altitude portion, did not seem to correlate well with the observed flight. In particular, the altitude profile showed two distinct peaks. Since I had no accelerometer on there, and I didn't note the exact time of launch, it was hard to tell from the data when the actual launch and landing took place.

The second test flight had different issues, though the electronic payload did its job. At the last minute, I decided to clip in my Jolly Logic 2 altimeter so I'd have data to compare. It seems that when I did this, I did not re-connect the main booster section with the upper payload bay and nose cone assembly (normally held together by a small quick link). Oops. The rocket took off and weather-cocked SE, as did most flights that day. After ejection, the main booster, still attached to the parachute, drifted about a quarter mile NW of the pad. I lost contact with the tracker shortly after ejection.

Here's where a shortcoming in my receiver came back to bite me. While it records everything it receives on a local SD card, I was short on time, and didn't include a feature to show me the latest valid GPS position received. So once I lost contact, I had nothing. I should've paid more attention to my ground test results and implemented this feature.

Nevertheless, I located the rocket rather quickly, and that is when I discovered that the payload section, with the nose cone and Jolly Logic, were missing. Upon inspection I realized my mistake, and that the missing components must've separated at ejection and would this be in the tall grass to the SE of the pad. My assumption at that point was that the payload stopped transmitting on impact. We spent a bit of time searching the suspected area for the payload, but no luck.

Returning home, I popped the SD card out of the receiver and into my computer to look at the data that was received. As I'd hoped, it showed a track ending right to the SE.


I returned to the launch site the next morning, and found the entire assembly in about 10 minutes. The body tube was cracked, but the payload was undamaged, and upon further inspection at home I determined that the electronics were still in working order. The only issue I saw was that the SD card seemed to dislodge on impact.


The other thing I've noted is that the altitude reading from the GPS just doesn't seem to keep up with rocket flight. It never registered over a couple hundred feet, even thought the rocket went to over 800 feet. I never had this issue with the GPS in the previous version of the tracker, though it did seem to lag a bit, so maybe the issue is more pronounced on lower altitude flights.

Next Steps

I've since rebuilt the payload section and am ready for further tests. 

I need to change the receiver so it has an option to show the latest received GPS coordinates. (Or at least bring my computer to the launch.)

I want to conduct further ground tests at a launch site to get a better idea of transmission range on the ground.

Finally, after the above are done, I want to re-design the entire package to include either an altimeter, or perhaps a 10DOF package that includes and altimeter and accelerometer. Also make battery charging more accessible.

I just got a nifty new kit for Christmas -  1.6" fiberglass mini Frenzy from Madcow. I hope to someday adapt this system to fit in that, and launch it with an H or even an I motor and see what it does.


Saturday, August 2, 2014

NARAM 56

Last week, my family and I attended NARAM 56 in Pueblo, CO. This was my first time attending any national rocketry event, so I wanted to record my impressions, as well as any advice for other future first-timers.

First I should make it clear why I went:

  1. The first reason was to watch the ULA intern rocket launches. How could watching the launch of a 25 foot tall rocket not be cool?
  2. I've never been to a club launch other than CRASH, which does non-waivered launches, so this would be a neat opportunity to see some bigger stuff fly.
  3. I decided to do my L1 certification attempt.
  4. And finally, I went for the fun of being around lots of other rocket geeks (and vendors).
One thing I've come to realize, which perhaps should have been obvious from the name of the event, is that much of the focus is about competitions (the AM in NARAM is for "Annual Meet", after all). I've never really been into official competitions (rocketry or otherwise), so that's not really my thing. Nevertheless, the sport range was set to be open all week, and there were nightly events at the hotel, so I knew there would be lots to do.


The ULA Launch

One interesting point to make here is that there is really no link between NARAM in general and the ULA launch. AFAIK, the ULA launch happens at the SCORE site in Pueblo every year, and it just happened to coincide with NARAM 56 being there this year. While the ULA launches were a big draw and focal point of the first day of NARAM 56, I'll note two things: First, the ULA page describing the 2014 launches says NOTHING about the NAR, NARAM, or SCORE (while the reverse is not true - the NARAM 56 site does have info about the ULA launches). Second, the ULA interns I spoke to seemed correspondingly uninterested in the NAR and NARAM. They were there on Saturday, did their launches, and then were gone. The few that my wife and I spoke to, even at their information booth, were definitely not there to promote any sort of NAR involvement. To be frank - and to be fair, maybe this was just the handful of interns we spoke with - they didn't seem interested in promoting anything, including ULA. They were pretty wrapped up in themselves. Maybe that's just college kids for you.

Nevertheless, it was pretty cool to watch the launches. Since two out of three of them are O class rockets, we had to be about 2000 feet away. But still, really cool to see. Big, bright, smokey, and LOUD. I'd definitely make the two hour drive down to Pueblo just to see this again.

Here are a few points of advice for first timers if you ever go to see these:
  • Before you go, check out the ULA site for event details. I'd only looked for info on the NARAM 56 site, which didn't have as much of the schedule detail as the ULA site did. So I didn't know the specific launch schedule until we arrived that morning.
  • Get there early, not just to stake out a viewing spot, but to get a close-up look at the rockets. They only allow this for a one-hour window in the morning, and you have to factor in time for the 3/4 mile round trip walk to do this (a big consideration if, like us, you have little kids with you).
  • Bring some sort of sunshade. This year, the launches were scheduled for 10:00, 11:00, and 12:00, but they were somewhat delayed (and I gather that happens for one reason or another every year). 
  • Bring a portable FM radio. We got there late enough that we had to set ourselves a good distance from the PA area. While there's not a bad seat in the house for viewing the launches, we could barely hear the PA, and almost missed one launch because we couldn't hear the countdown. If you get there early enough to stake out a good spot, this won't be an issue. But apparently they were broadcasting the PA on a localized FM frequency as well.
  • As you're hanging out waiting for the launches, chat up your neighbors. Many of the people there to observe have some sort of connection to the project, so you never know what you might learn. We happened to be sitting by a retired ULA engineer who's been an advisor on the project for five years, and also the parents of an intern who built one of the payloads.

Stars 'n'Stripes shortly before launch.

Stars 'n'Stripes goes up.

Recovery of the booster stage of Future. These guys were hot and tired after a long walk.


Hanging out at NARAM in general
  • Sport Launching: We had a great time doing this. It was crowded on the weekend, but from Monday on was low-key. So cool to just be there and see all the rockets and all the flights. Many big rockets (up through M class), many odd rocs. Of course, everyone is happy to talk about their rockets, your rockets, and whatever else. We met a ton of really nice people. Bring a big sunshade and table and set up your spot.
  • Vendors: No vendors ever set up at the hotel, although a room was available for them to if they wanted. There were a whole lot of them at the sport range, but that started to thin out after the weekend (though there was always at least someone selling motors). I never noted anyone offering any special deals for the event (other than 10% off of your next web order or something to that effect). 
  • The competitions: As I said, I'm not really a competitor. But since registration included participation in one event for free, I decided to enter the 160m set altitude comp just to see what it was like (I happen to have one rocket that I've flown with an altimeter that hits within 10m of that fairly reliably). Short story: I don't plan to become more of a competitor in the future. These folks take this very seriously. If you're a newcomer to this, read and understand the Pink Book so you know the process, because (in my limited experience) people at the event were not entirely patient with newbs who don't know the process, and don't have the time, willingness, or people skills to speak the two or three sentences that might make clear what you need to do next. Overall, I find sport launching a lot more fun that the competitions.

Everything Else

There was always something going on in the evenings: viewing rockets submitted for the "fun event" competitions (as well as "real" comps), viewing of prang videos (a scheduled night launch was canceled due to weather), a fundraising auction, etc. This stuff was all neat to see, and another great chance to mingle and chat with other rocket buffs. As I mentioned before, we met so many nice and interesting people.


Final Thoughts

It was a great time. We all enjoyed it - even my wife, who is not really a "rocket person." It was a great chance to get more involved in the hobby, meet people, see some interesting things people have done,  and also feel my way around what specific areas of it interest me most (HPR- yes, competitions - no). While I don't know that I'd go any further than a few hours' drive for another such event in the future, it does make me want to become more involved with my local NAR sections.


HPR L1 - part three - (Successful!) Certification

The start date for NARAM 56 finally arrived (I plan to write another post with my impressions) and we made our way down to Pueblo. On the advice of one of the NAR board members I met at check-in, we spent Saturday just watching the ULA launches and "enjoying the festivities", and had a relaxing day Sunday doing a bit of low power sport launching of our own. I planned to try for certification on Monday, when the sport range would be much more low-key.

The only drawback to this was that over the course of the weekend, I witnessed about a dozen other certification attempts, three or four of which were unsuccessful (including an L2 attempt that blew to pieces a few hundred feet up). That didn't exactly bolster my confidence, but on the other hand, I'd done my homework and was confident in my build and planning.

The weather on Monday was slightly windy, but otherwise good. As soon as we got to the field, I began my prep, loading up a 38mm Cesaroni H120 Red Lightning motor and preparing my payload. In addition to my own data logger, I also included my Jolly Logic 2 altimeter. (Actually my new Jolly Logic. I'd lost my old one the previous day when it came detached from my Mozzie, presumably at ejection. Two zip ties to attach it, from now on.)

The certification process was exactly as I think it should be. Steve Lubliner of SARA (Tuscon) did my cert. He was friendly, and - more importantly - thorough. He checked out the rocket, asked me several questions about the build, and sent me out to the pad. One small comment - "Nice build" - boosted my confidence immensely.

My kids were out there with me to help as I loaded the rocket onto the pad, and my wife took photos. Then there were many agonizing minutes spent waiting for my turn for launch. I was fortunate to have the moral support of family and new friends as I paced about.

Finally - countdown and liftoff! I honestly couldn't have asked for a better flight. Straight up, flawless recovery system deployment (I used motor ejection - no need to complicate things on a cert attempt - plenty of opportunity to get fancy later), and soft touchdown in the field about 100 meters away from the pad.


Loading it onto the rail.


This photo is actually from the second flight (on Tuesday) using a CTI H123 Skidmark motor. Less total impulse, but it makes for a better photo :)


Launch video - also on the Skidmark motor. The camera got bumped and we missed video of the cert flight.


One other change I made to the standard kit: I swapped the 36" flat chute for a 36" elliptical Fruity Chute. Expensive, but I think it lowered the descent rate to a much more acceptable 19 fps (compared to an estimated 28 fps with the stock chute).


Recovery team.


Final inspection and "welcome to high power."


A plot from the data off of my data logger. Two interesting things: First, the GPS seems like it wasn't able to keep up during the quick boost phase, which didn't surprise me. Second, the barometric pressure sensor reported a height about 16% hight than either the GPS or the Jolly Logic altimeter. The accelerometer also reported a peak acceleration slightly higher than the Jolly Logic. But otherwise the data looks as I expect it would. It will take more analysis and testing before I can decide what to trust.


Flight Stats (from the Jolly Logic)
  • Height (AGL): 1449 ft
  • Top Speed: 223 mph
  • Peak/Average Acceleration: 6.6/5.5 G
  • Thrust duration: 1.85 s (seems low compared to the motor thrust curve)
  • Coast to Apogee: 8.3 s
  • Apogee to Ejection: 1.0 s
  • Descent Rate: 13mph
  • Total Duration: 82.5 s

Final Thoughts

I'd like to say that I learned something from the certification process, but that's really not the case. The cert was almost a formality. The learning was all in the advance prep and research. Here would be my advice to anyone else pursuing L1:
  1. Don't get ahead of yourself. Learn the hobby and don't skip steps. Become proficient with low power and mid power first. There is a lot to learn along the way.
  2. Keep it simple. Go with a solid, basic kit and motor ejection. I also chose Cesaroni reloads since they are so much simpler to use than Aerotech.
  3. An absolute must: use simulation software - OpenRocket (my choice) or RockSim. I used this to determine CP/stability, descent rate (and proper parachute choice), and ejection delay.


Friday, July 11, 2014

HPR L1 - part two - The Payload

As I stated in my last post, I can explore and learn with the Torrent kit in a number of ways, but my immediate goal is Level One HPR certification. That said, however, I can't just leave an empty seat in a payload bay when a rocket is going up with a $30 motor.

Aside from rocketry, the other things I've been playing around with a lot lately are electronics and microcontrollers. Some time ago, I'd picked up a GPS component on clearance at Radio Shack for pretty cheap. After testing it out with an Arduino, I decided that I could build a data logger to ride along on my L1 flight. In addition, I've added a couple of very inexpensive sensors I got from China on eBay - a barometric pressure sensor to detect altitude, and a 3-axis accelerometer.

Here's the parts list:
  • Arduino 3.3V Pro Mini - $4 (Arduino Day sale price - thanks SparFun!)
  • Parallax PMB-648 GPS module - I don't remember how much it was.
  • BMP-180 pressure sensor - $2 (from eBay)
  • ADXL345 accelerometer - $3 (from eBay)
  • SD card reader breakout board - $3 (from eBay)
  • 9V batter holder
  • RGB LED
  • 3 resistors
  • Adafruit half-size Perma-Proto board
  • a small slide switch
  • some 22 gauge wire
  • female headers
  • solder
  • some M2 and M3 screws, nuts, and standoffs for mounting everything
Overall, under $40.

It's not the most compact or elegant package, but mainly with this version I want to see if it works, how everything holds up under launch G-forces and recovery conditions, and what kind of data I get. If it works well, I plan to build a new version, using a 10 DOF board, a micro-SD card, and maybe a better/smaller GPS and a LiPo battery.

Here's a diagram of how I wired it. I mounted the Arduino, the pressure sensor, and the accelerometer on the proto-board, but in this diagram I just included the headers to show where they would be placed, since there are some wires running underneath the breakout boards. The specific Arduino pin connections are detailed in the comments of the sketch.


The ADXL345 board I have has two rows of 5 pins, and is mounted in rows I6-10 and A6-10. The BMP180 is in E12-15. The Arduino has pin 9 at the top left. Note also that the Arduino Micro has A4 and A5 hole that are not on the outer edge, so the green and yellow wires shown at D14 and D15 are actually wires that are soldered directly to the Pro Micro. Also, I chose a 470 Ω resistor for the green portion of the LED because otherwise it looked a whole lot brighter than the red and blue components.

The pressure sensor and the accelerometer communicate with the Arduino over I2C, and I use the Adafruit libraries to interface with them. The SD card connects over SPI. In initial testing, I tried reading the GPS with SoftwareSerial, but found that it was a lot faster connected to the hardware UART TX/RX lines. Note that in my final configuration, I did not solder the GPS line that connects to RX1, but instead connect it with a jumper, because this needs to be disconnected whenever I re-program the Arduino.

I didn't bother making any sort of power switch that I could access when this is set up inside the payload bay for two reasons: First, since this device doesn't arm any sort of ejection charge, there is no safety consideration for doing it. Second, in testing I found that it will easily run for over two hours on a rechargeable 9V, so it is no problem to just power it up as I prep the rocket for launch, even if it means that it runs and collects ground data while I wait for a launch spot.

When running, the LED flashes each time a write is done to the SD card,  with one color indicating if each of the three sensors is working. Typically it will  flash with red and green immediately on power-up, then after 30s or so, when the GPS gets a fix, the blue will kick in. I've found that I can see these colors by peaking into the vent hole of the bay when it is all loaded up for a final check.

The data is written to a CSV file on the SD card. I get about 12 lines per second of altimeter and accelerometer data, and a new GPS read about once or twice a second (this seems to come in at random times). With an old 2GB SD card in there, I have more space than I'll ever need. I'd considered using EEPROM modules to store the data to save some physical space and power, but it would limit the memory space too much and make it harder to download the data. Plus power use doesn't seem to be an issue, so it didn't seem worth pursuing. Maybe in a future version.

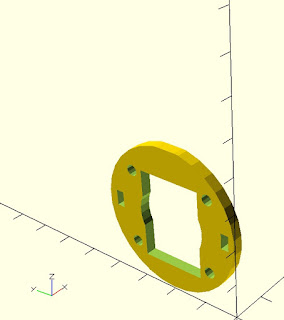
Partly because of its bulk, and partly because I want to save the sled that came with the Torrent kit for a "real" dual-deployment altimeter, I made my own sled for mounting of the electronics. I epoxied four 1.5" lengths of aluminum tubing to a piece of 1/8" thick craft plywood cut to fit all the components, then mounted everything up with the screws. Except the GPS, which has no mounting holes - that is just held on with double-stick foam tape. I'm crossing my fingers on that one (though I may do something else to reinforce it - zip tie holes?).

Overall weight of the electronics, battery, and sled is 148g.

All completed, here is what it looks like, before and after mounting it on the sled:


And finally, here is the Arduino sketch I put together:

/* Torrent datalogger payload
   
 OUTPUT FILE FORMAT:
   millis, altitude (m), x accel (m/s^2), y accel, z accel,
   lat, long, GPS altitude, course, speed, satellites, date, time
 
 * SD card attached to SPI bus as follows:
 ** MOSI - pin 11 - green
 ** MISO - pin 12 - blue
 ** CLK - pin 13  - yellow
 ** CS - pin 4    - orange
 
 Altimeter, accelerometer (I2C):
   Connect SCL to analog 5
   Connect SDA to analog 4
   Connect VDD to 3.3V DC
   Connect GROUND to common ground
   
 GPS
   Yellow wire to Arduino RX

 Status LED
  red - 7 green - 8  blue - 9
   
 */
 
#include <SD.h>
#include <Wire.h>
#include <Adafruit_Sensor.h>
#include <Adafruit_BMP085_U.h>
#include <Adafruit_ADXL345_U.h>
#include <TinyGPS.h>

int led = 13;
int red = 7;
int green = 8;
int blue = 9;
boolean red_status = LOW;
boolean green_status = LOW;
boolean blue_status = LOW;
unsigned long last_fix = 1;

File myFile;
Adafruit_BMP085_Unified bmp = Adafruit_BMP085_Unified(10085);
Adafruit_ADXL345_Unified accel = Adafruit_ADXL345_Unified(12345);
float adxl[3];
TinyGPS gps;

void setup()
{
  Serial.begin(4800);  // necessary for GPS read
  pinMode(led, OUTPUT);
  pinMode(red, OUTPUT);    
  pinMode(green, OUTPUT);
  pinMode(blue, OUTPUT);
  
  /* Initialise the altimeter */
  if(!bmp.begin())
  {
    //Serial.print("Ooops, no BMP085 detected ... Check your wiring or I2C ADDR!");
    ;
  }
  
  /* Initialise the accelerometer */
  if(!accel.begin())
  {
    /* There was a problem detecting the ADXL345 ... check your connections */
    //Serial.println("Ooops, no ADXL345 detected ... Check your wiring!");
    ;
  }
  accel.setRange(ADXL345_RANGE_16_G);

  // On the Ethernet Shield, CS is pin 4. It's set as an output by default.
  // Note that even if it's not used as the CS pin, the hardware SS pin 
  // (10 on most Arduino boards, 53 on the Mega) must be left as an output 
  // or the SD library functions will not work. 
   pinMode(10, OUTPUT);
   
  if (!SD.begin(4)) {
    //Serial.println("initialization failed!");
    return;
  }
  //Serial.println("initialization done.");
    
}  // setup

float get_altitude() {
  sensors_event_t event;
  bmp.getEvent(&event);
  if (event.pressure) {
    float temperature;
    bmp.getTemperature(&temperature);
    float seaLevelPressure = SENSORS_PRESSURE_SEALEVELHPA;
    //Serial.println(seaLevelPressure);
    float my_altitude;
    my_altitude = bmp.pressureToAltitude(seaLevelPressure,
                                        event.pressure,
                                        temperature);
    if ( my_altitude < 0 ) {
      red_status = LOW; 
      return -1;
    }
    else {
      red_status = HIGH; 
      return my_altitude;
    }
    
  }  
  else { 
    red_status = LOW; 
    return 0; }
}

void get_accel(float *pdata) {
  sensors_event_t event; 
  accel.getEvent(&event);
  if (event.acceleration.x) {
    pdata[0] = event.acceleration.x;
    pdata[1] = event.acceleration.y;
    pdata[2] = event.acceleration.z;
    green_status = HIGH;
  }
  else {
    green_status = LOW; 
    pdata[0] = 999; 
    pdata[1] = 999;
    pdata[2] = 999;
  }
}

bool feedgps() {
  while (Serial.available()) {
    if (gps.encode(Serial.read()))
      return true;
  }
  return false;
}


void gpsdump(TinyGPS &gps) {

  float latitude, longitude;
  unsigned long fix_age;
  gps.f_get_position(&latitude, &longitude, &fix_age);
  
  if (fix_age == TinyGPS::GPS_INVALID_AGE )
    blue_status = LOW;
  else if (fix_age > 2000)
    blue_status = LOW;
  else
    blue_status = HIGH;
  
  int year;
  byte month, day, hour, minute, second, hundredths;
  gps.crack_datetime(&year,&month,&day,&hour,&minute,&second,&hundredths);
  
  
  myFile.print(",");
  myFile.print(latitude,5);
  myFile.print(",");
  myFile.print(longitude,5);
  myFile.print(",");
  myFile.print(gps.f_altitude());
  myFile.print(",");
  myFile.print(gps.f_course());
  myFile.print(",");
  myFile.print(gps.f_speed_kmph());
  myFile.print(",");
  myFile.print(gps.satellites());
  myFile.print(",");
  myFile.print(month, DEC); myFile.print("/"); myFile.print(day, DEC); myFile.print("/"); myFile.print(year);
  myFile.print(",");
  myFile.print(hour, DEC); myFile.print(":"); myFile.print(minute, DEC); myFile.print(":"); myFile.print(second, DEC);

}


void led_on () {
  digitalWrite(red, red_status);
  digitalWrite(green, green_status);
  digitalWrite(blue, blue_status);
}

void led_off () {
  digitalWrite(red, LOW);
  digitalWrite(green, LOW);
  digitalWrite(blue, LOW);
}


void loop()
{
  myFile = SD.open("torr06.csv", FILE_WRITE);
  if (myFile) {
    //digitalWrite(led, HIGH);
    if ( millis() - last_fix > 4000 ) {
      blue_status = LOW;
    }
    led_on();
    //Serial.println("writing");
    myFile.print(millis());
    myFile.print(',');
    myFile.print(get_altitude());
    get_accel(&adxl[0]);
    myFile.print(',');
    myFile.print(adxl[0]);
    myFile.print(',');
    myFile.print(adxl[1]);
    myFile.print(',');
    myFile.print(adxl[2]);
    if (feedgps()) {
      last_fix = millis();
      gpsdump(gps);
    }
    myFile.println(' ');
    myFile.close();
    //digitalWrite(led, LOW);
    led_off();
  }

}


Tuesday, June 24, 2014

HPR L1 - part one - Building the Rocket


The next few blog entries concern my attempt for NAR Level One High Power Certification.

the motivation

At the end of July, I plan to attend NARAM 56 in Pueblo with my family. The initial motivation for this was to watch some of the really big HPR stuff, in particular the ULA launches. But of course I have to participate to some degree. In talking about it with my wife, she actually was the one who convinced me to go for my certification, reasoning that as long as we're taking several days to go down there, I might as well make the most of the event. How could I argue?

the rocket

For my L1 build, I selected the Madcow Torrent, for several reasons:
  • I like the kit designer. I've had one other Madcow kit, and really liked it.
  • The kit is not a giant stretch in terms of construction techniques, since it is all cardboard and wood.
  • I like the vendor. The Torrent is available (only) from Apogee. Their website is really excellent in terms of education and information, including a whole series of videos on construction of the Torrent. They have great customer service, and are always responsive with questions. Plus I like to buy from a local (Colorado) company, and it doesn't hurt that I was in the Springs so I didn't have to pay shipping.
  • I wanted something with a good size payload so I can experiment with my own custom-built avionics.
  • I can grow quite a bit with this kit. If all goes well, after I get my L1, I can further pursue L2 with this same rocket. Also, I can get experience with dual deployment easily since it comes with an ebay.

The one thing I don't like about the rocket is that, due to its weight, I can't fly it at the local CRASH launches. So for future flights, I'm going to have to attend either NAR national events, or else join up with NCR. Not a big deal though, since the 38mm H+ motors for this aren't cheap - I won't be flying it all that often. 

the build

I don't see the need to post any pictures of the build, because it's basically been "by the book" - or video in this case, following along with the Apogee tutorials. There are a couple things I will note:

  • Glue or epoxy? I struggled with this decision quite a bit. In general, I'd rather not use epoxy unless I need to. And reading around, the results are interesting. Everyone says that for wood and paper, wood glue with give you just as strong a bond as epoxy. But it's rare to see anyone say that they've done an HPR build with wood glue, with the very notable exception of the Apogee videos. I even went so far as to email Mike Stoop at Madcow to ask his opinion. His answer was interesting:  
me: I'm following the Super DX3 instructions from Madcow, which say to use epoxy.
On Apogee's website, they have a series of construction videos in which they use wood glue for all the wood/cardboard joints.
Reading various forums, the general consensus seems to be that for wood/cardboard, wood glue is as strong as epoxy, and lighter. Yet a lot of people still exclusively use epoxy on their HP builds.
I was just wondering what your take is on this. 
Mike Stoop: I would tend to agree on the wood glue - it is much easier to use.  However, we have not built any of our kits with wood glue, we only use epoxy.  Sorry can’t be more help on this. 
In the end, I decided to go with wood glue, though I still lose a little sleep over the decision, particularly since it really wouldn't have hurt to just have used the darn epoxy. Will it hold up? time will tell. But it's only my first HPR build - probably won't be my last.
  • Shock cord/mount. Not a big modification, but I did not tie my shock cord to the eye bolt on the forward ring. On this 4" diameter rocket, it is easy enough for me to reach in there and attach it with a quick link. I like the flexibility this offers. Also, I purchased a nomex sleeve for the tubular nylon shock cord.
  • Internal fillets. There are a couple of nicely documented builds of this model on the Rocketry Forum. Following the lead of a couple of these, I put some good internal fillets on my fins and motor mount. First I glued only the forward centering ring onto the motor tube. I then glued this inside the airframe, using the UNglued aft ring to position it. Removing the aft ring, I was able to put good heavy fillets on both sides of the forward ring. Next I mounted the fins, and again, with the aft ring not in place, I was able to put good internal fillets on the fins where they connected to the airframe and motor tube. Then finally I glued in the aft ring.
  • Motor retention. I bought an Aeropack retainer to use with this rocket, which would've been great if I hadn't messed up and left not quite enough of the motor tube exposed to attach it fully. So instead I went with a Madcow retainer.
  • Finally, I added parachute swivel.

I've considered getting a larger parachute than the 36" that comes with the kit. Some reviews indicate that it may be a bit undersized, and my simulations with OpenRocket bear this out, showing an approximate descent rate of 28 fps for the fully built rocket with ebay sled. I've decided to stick with the stock chute for the initial flight and see what the actual descent rate is from my Jolly Logic 2 altimeter. Again, hopefully I won't regret this decision, as a damaged rocket will result in a failed certification attempt.

Throughout the build, I've weighed all components and re-weighed them as they'd been assembled, updating a detailed OpenRocket design. I'll do the final real-world CG measurements when I've go the paint on, but for now it looks like I've got good stability (1.5 to 1.6 cal) for H and I motors.

One other thing I'll comment on. Being a little old-fashioned, I like books. And you can't argue that Harry Stine's Handbook of Model Rocketry is anything but a great book to have. I also like the comprehensiveness and level of detail in Tim Van Milligan's Model Rocket Design and Construction. So I decided to buy Modern High Power Rocketry - 2nd ed. from NARTS. I won't mince words here - it was mostly a waste of money. While the book is a good overview of the topic, it doesn't really go into great depth on anything. The information it provides is readily available from vendor/organization websites, casual web browsing, or even the two books formerly mentioned. Many of the diagrams look like they were done on a Commodore 64. Further, it is extremely repetitive. Each chapter not only rehashes much information from other related chapters, but there are numerous sidebars that add nothing other than repeating information from the main text. The chapters on Level 3 are interesting and fun to read, but most likely won't ever be of practical use to me. There is exactly one new and worthwhile piece of information I got from this book: substitute closed (forged) eyebolts for the open eyebolts generally supplied with kits. They don't weigh much more and are much stronger. Alas, I read this after I'd already mounted my open bolts with epoxy, but I don't imagine it will be a problem on the four pound Torrent. But definitely something to keep in mind for future HPR builds, especially if I ever get to something big and really heavy.

the motor

For my certification attempt, I'll be using a Cesaroni H120 in a Pro38 casing. I've never used a reloadable motor before, so the simplicity of the Cesaroni system (compared to Aerotech) was appealing. Also, I like having the ability to put spacers in the casing, so the Pro38 case can be used with various sizes of reloads. I purchased 3-grain case with two spacers, but plan to purchase 6-grain case as well in the future for L2 certification. This will allow me to use a huge range of Cesaroni 38mm reloads.

The clincher, however, was the Cesaroni certification special, which gives you the casing for free. Can't beat that.

the payload

On the certification flight, I plan to have my trusty little Jolly Logic 2 on board, as well as a custom-built data logger. I've got all sorts of plans and ideas for avionics, but for this initial attempt, I plan to build something to log GPS, altimeter, and accelerometer data. Details on this in my next post…